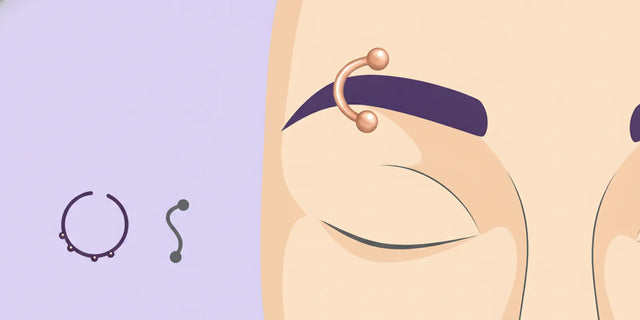
Threaded vs Threadless Jewelry: How to Choose

Choosing between threaded vs threadless jewelry comes down to how the decorative end connects to its post, how you prefer to handle it, and whether the piece is made for your piercing. Neither closure style alone tells you whether jewelry is suitable. Compare the mechanism, size, material, and intended use before deciding.
Contact Z-Edge about jewelry options
What is the difference between threaded and threadless jewelry?
Think of the post and decorative end as two parts of a small assembly. The closure describes the interface between those parts; it does not describe the jewelry's full shape, size, or material. That distinction helps when you read listings: “threaded” or “threadless” identifies the connection method, while other product details tell you what the piece is made from and how it is intended to fit.
Threaded jewelry joins the end and post using a screw connection. Depending on the design, the end may screw into the post or a threaded post may accept a matching end. To remove it, you turn the parts in opposite directions. The connection relies on compatible threads and a snug fit.
Threadless jewelry uses tension rather than screw threads. A small pin on the end is gently bent to create tension, then inserted into a hollow post. The pin sits inside the post and holds the decorative end in place. To take it apart, the end is pulled straight out rather than unscrewed.
These are different closure systems, not quality grades. A well-made piece in the right size and suitable material matters more than the closure label. Z-Edge focuses on ASTM F136 implant-grade titanium and nickel-free 14K gold for its piercing jewelry.
How do the two closures compare in everyday use?
The best choice depends on the jewelry design and your comfort handling its parts. Threaded ends require a turning motion. Threadless ends use a push-fit connection. Both need careful handling, clean hands, and the correct component pairing. Do not force a part that does not fit smoothly.
A turning motion can be awkward when a part is very small or positioned where it is difficult to see. A straight pull-and-press motion avoids turning, but still requires a steady grip and precise alignment. Neither mechanism eliminates the practical challenge of handling tiny jewelry components. Consider which motion you can manage without rushing.
| Consideration | Threaded | Threadless |
|---|---|---|
| How it connects | Matching screw threads join the end and post. | A tensioned pin presses into a hollow post. |
| How it is removed | Turn the end and post apart. | Pull the end straight out of the post. |
| What to check | Thread direction and compatibility between parts. | Pin tension and compatibility with the post. |
| Handling consideration | Small ends can be difficult to grip while turning. | Small ends can be difficult to hold while pulling. |
| Material and fit | Check independently; closure type does not establish material or size. | Check independently; closure type does not establish material or size. |
What should you check before choosing?
Start with the piercing and the jewelry form you need. A flat-back post, ring, curved barbell, or other style has its own shape and sizing needs. The closure must suit that piece; choosing a familiar mechanism is not enough if the post length, gauge, or end configuration is wrong.
Next, confirm that the end and post are designed to work together. A threaded end needs matching threads. A threadless end needs a compatible hollow post and an appropriately tensioned pin. Parts that look similar may not be interchangeable. Keep the components together and avoid mixing pieces without confirming compatibility.
Finally, consider material and finish. Z-Edge uses ASTM F136 implant-grade titanium and nickel-free 14K gold. Steel is an inferior option and is not comparable to those materials. For a titanium option, browse titanium and gold barbells; for decorative threadless ends, see dangle tops and new jewelry arrivals.
How do you handle threaded jewelry?
Wash and dry your hands before handling jewelry. Hold the post steadily and turn the end gently. If it does not move, stop rather than applying more force. A tiny end can be hard to grip, and excessive force can make handling more difficult or cause a small component to slip away.
When reinstalling a threaded end, align the parts and turn gently until they meet securely. Avoid cross-threading: if the end does not catch smoothly, back off and realign it. Do not use tools to tighten a small jewelry end. Keep spare ends and posts in a clean, secure place so components are not lost or mixed.
Thread direction can vary by jewelry design. Do not assume every piece tightens the same way. If you are replacing a component, check the product's compatibility details and preserve the original post and end information. The threadless jewelry guide gives more detail on the press-fit system and how its parts work.
Before starting, plan where each part will go when it is removed. A small dish or clean surface with a light-colored background makes it easier to keep track of a tiny end. Avoid working over a sink, carpet, or other place where a dropped component may be hard to find. If you cannot maintain a secure grip, pause instead of trying to finish quickly.
How do you handle threadless jewelry?
Threadless jewelry separates by pulling the end straight out of the post. Keep the post steady and use a controlled motion. When inserting an end, the pin should enter the hollow post with a snug press fit. Do not bend the pin sharply or repeatedly; changing its shape too much can weaken the connection.
If the end feels loose, do not rely on repeated adjustments while wearing it. The pin may need a small tension adjustment, but forceful bending can damage it. If it is too tight to insert or remove with reasonable control, stop and check that the end and post are the correct match.
A threadless closure can be convenient when you want to avoid turning a very small end, but it still has small parts that require careful handling. Keep the post stable, work over a clean surface, and store the end safely during a jewelry change. Avoid pulling at an angle, since a straight, controlled motion gives you better control of the connection.
Do not use the feel of resistance as the only test of suitability. Resistance can reflect how the pin and post fit together, but it does not tell you whether the material, gauge, or length is appropriate. Check each product detail separately, and do not repeatedly bend the pin to compensate for mismatched parts.
Which closure is the better choice?
There is no universal winner. Your choice can depend on the exact jewelry piece, your dexterity, and how you prefer to manage a small end. Someone who is comfortable with a turning motion may favor threaded jewelry. Someone who prefers a straight pull-and-press motion may prefer threadless jewelry. Those preferences do not replace the need for a compatible fit.
Consider the complete piece rather than the closure in isolation. Look at the post length and gauge, the end shape, the material, and how the jewelry is intended to sit. For example, a decorative end is only useful if it pairs with the post and fits the piercing. Browse dermal jewelry or septum jewelry by category, then check the listed configuration and material before selecting a piece.
For new or healing piercings, avoid treating a closure change as a reason to change jewelry prematurely. Follow the care instructions provided for your piercing, and use piercing aftercare products as directed. Do not rotate, force, or repeatedly remove jewelry just to test how it closes.
A practical way to decide is to write down the specifications you need before browsing: piercing location, jewelry type, gauge, post length where relevant, connection style, and material. Then compare listings against that list. This helps keep an appealing decorative end from distracting you from the less visible details that determine whether the whole piece is the right match.
How can you choose by piercing location and jewelry form?
The connection question is only one part of choosing a piece. Start by identifying the piercing and the jewelry form it currently takes. A straight post, curved barbell, ring, and surface-style piece do not share the same shape or placement needs. The end connection must belong to a configuration intended for that form, rather than simply being a familiar closure that happens to look similar.
For a post-style piece, record the gauge and wearable length you need before browsing. Gauge describes thickness; length describes the part of the post that sits through the piercing. These measurements serve different purposes, so one cannot substitute for the other. If you already have a piece that fits comfortably, its product details can help you identify the dimensions, but do not assume another jewelry form uses the same measurements.
Rings call for a different check. Their diameter and opening or closure design affect how the ring sits, while a post's length is not the relevant measure. A threaded end or threadless top generally belongs to a post-based arrangement; do not assume that every ring can accept a separate decorative top. Browse the appropriate category, such as navel jewelry, and match the product form to the piercing rather than relying on a general label.
Placement also changes how a closure feels in use. A piece that is easy to see and hold in front of a mirror may be harder to manage in a less accessible spot. Imagine the actual motion you would need to make: steady the post, align the end, and either turn or press it without pulling the jewelry sideways. If the position makes that sequence awkward, the closure you find easiest in your hand may not feel equally manageable when worn.
Decorative scale matters too. A large or projecting end may catch on hair, clothing, or bedding more readily than a low-profile design, depending on its placement and daily routine. This is not determined by threaded versus threadless construction. Compare the end's shape and dimensions with where it will sit, and consider whether the piece is intended for everyday wear or for a particular look. Do not infer comfort or suitability from a product photo alone.
What mistakes should you avoid?
- Mixing components without checking: Similar-looking posts and ends may use different connection systems or dimensions.
- Forcing a stuck connection: Stop if the end will not turn or pull free with controlled effort.
- Over-adjusting a pin: Repeated or sharp bending can affect a threadless end's tension.
- Choosing by closure alone: Material, size, shape, and suitability still matter.
- Assuming a loose end is secure: Confirm the connection before wearing the jewelry.
- Handling over an unsafe surface: Small ends can be dropped or lost, so work over a clean, stable area.
When comparing products, read the material and configuration details rather than relying on a product photo. Z-Edge's titanium threadless end is an example of a decorative end listing; confirm that any end you select matches the post you plan to use.
Another common error is assuming all parts from one jewelry category share a standard. A post and end can differ in gauge, length, attachment style, or design even when both are described with the same broad label. Treat a product name or image as a starting point, not a substitute for checking specifications.
How can you compare product listings?
Compare listings in a consistent order so that an attractive design does not obscure a mismatch. First, verify the item type: is the listing for a decorative end only, a post only, or a complete assembly? Second, find the stated material and determine which component that description covers. Third, note the closure system and the components it is meant to pair with. Finally, compare the dimensions with the requirements of your piercing and jewelry form.
A practical comparison note can be as simple as: “flat-back post, known gauge, required length, threadless end, titanium.” Fill in the specifications you actually know and leave uncertain fields marked for confirmation instead of guessing. Then compare each listing against the note. If one product provides a clear description of the connection but omits the post dimensions, it has not answered the full fit question. A second listing with different terminology may still be a match, but only when its details establish the same required configuration.
Pay close attention to words such as “top,” “end,” “post,” and “barbell.” A top may refer only to the decorative part, while an assembled piece includes more than one component. Product images often show a complete arrangement for display even when the listed item is a single replacement part. Read what is included, and do not count a post as part of an order unless the listing says it is included.
Likewise, distinguish a material claim about one piece from a claim about a whole assembly. If a gold decorative top is pictured with a separate post, the description should make clear what the post is made from. Z-Edge's stated piercing-jewelry materials are ASTM F136 implant-grade titanium and nickel-free 14K gold. Check the component details rather than assuming a matching color means a matching material.
When two listings both appear to meet your needs, compare their intended connection and the exact measurements before considering design preference. For a post-based setup, a threaded end and threadless end are not interchangeable simply because they fit the same visual style. A decorative top is useful only if its connection matches the post, and a compatible connection still does not prove that the post's dimensions suit the piercing.
A useful product listing should identify more than the decorative appearance. Look for the jewelry type, the material, and enough information to understand which components are included. If a listing shows an end without a post, do not assume the post is part of the purchase. If it shows a complete piece, check whether the closure is threaded or threadless and whether it is the configuration you need.
Use a short checklist when comparing options. First, identify your piercing and the form of jewelry it takes. Next, check the listed gauge and post length where those details apply. Then confirm the material and closure system. Finally, make sure the end and post are intended to work together. This order prevents a decorative detail from distracting from a more basic fit or compatibility question.
For example, two ends may look nearly identical in a photo but use different attachment systems. One may have a screw connection while the other has a pin designed for a hollow post. The image alone may not reveal the difference. Read the product details, and compare them with the post you already have rather than relying on appearance.
Check whether the listing describes a single end, a post, or an assembled piece. These are different purchase configurations. If a listing identifies only a decorative top, account for the compatible post separately rather than assuming the pictured assembly is included. Also note whether the material description applies to the entire piece or only a component.
How can you plan a careful jewelry change?
Preparation makes the closure easier to manage. Before starting, set out the replacement components, confirm which parts belong together, and choose a clean, stable surface with enough light. Have a small dish or another safe place ready for the end you remove. Keep the new piece close by and organized so that you do not need to search for a component while holding the post or trying to maintain alignment.
Use a simple sequence rather than improvising. Wash and dry your hands, then make sure you can see the connection clearly. Stabilize the post or jewelry body before manipulating the end. For threaded parts, align before turning; for threadless parts, keep the pin aligned with the hollow post and use controlled pressure. Do not use the same motion for both systems, and do not treat a resistance or click as proof that every specification is correct.
After joining the pieces, visually inspect the assembly and check that the end sits as intended without an obvious gap or wobble. Do not tug hard to test it, twist repeatedly, or bend a pin back and forth. These actions can make handling less predictable. If the connection remains loose, will not align, or requires force, stop and set the pieces aside rather than continuing to experiment.
Think about what you will do if the change does not go smoothly. Keep the previous jewelry available until the replacement is assembled and fits as expected; do not discard packaging or identifying details before you have confirmed the new configuration. If a component is dropped, pause and locate it before handling anything else. A calm, deliberate process is more useful than trying to complete a change in a hurry.
It may also help to review the listing before beginning, not while you are midway through the change. Confirm whether the parts use threads or a press-fit pin, whether the post is included, and whether the described material and dimensions are the ones you intended to choose. A few minutes spent on this comparison can prevent an avoidable mismatch and repeated handling of small parts.
When should you pause a jewelry change?
Pause if a connection feels stuck, a component does not align, or you cannot tell whether the post and end match. Do not twist harder, pull sharply, or use household tools. A small jewelry component is easy to drop, and force can damage the connection or make the parts harder to handle.
Also avoid changing jewelry simply to experiment with different closure types while a piercing is healing. A new closure does not make an unsuitable size or material appropriate. Keep to the care guidance for your piercing, and do not repeatedly remove jewelry for inspection. If the jewelry is difficult to manage, choosing a clearly identified compatible piece is a better starting point than trying random parts.
Planning ahead helps with established piercings too. Before a change, set out the new components on a clean surface and confirm the connection system. Keep the existing jewelry nearby until the replacement is correctly assembled. If the new piece does not fit as expected, stop and avoid forcing it into place.
Make the change when you have enough time, good lighting, and a stable place to set down the components. Rushing increases the chance of losing a tiny end or misaligning the connection. If anything feels unexpectedly painful or the jewelry will not move with gentle handling, stop rather than turning the process into a test of force.
For broader consumer information about products and health, consult the U.S. Food and Drug Administration.
Contact Z-Edge to discuss jewelry choices
Frequently Asked Questions
Can threaded and threadless ends use the same post?
No. Threaded ends need a matching threaded post, while threadless ends fit a hollow post designed for a press-fit pin. Confirm the connection type and compatibility before combining components.
Is threadless jewelry always easier to change?
Not for everyone. Threadless jewelry avoids unscrewing a small end, but its parts still need controlled handling and a compatible fit. Your dexterity and the specific jewelry design affect what feels easier.
Does the closure determine the jewelry material?
No. Threaded and threadless describe how the end connects to the post. Check the material separately. Z-Edge uses ASTM F136 implant-grade titanium and nickel-free 14K gold.
Can I keep wearing jewelry if its end feels loose?
A loose connection should not be ignored. Stop manipulating it repeatedly, check that the parts match, and do not wear a component that will not stay securely connected.
The right choice is the closure that suits the jewelry design and your handling preference, with compatible parts, appropriate sizing, and a material you can identify with confidence.